5.5. レンズ補正...

5.5.1. 概観

図17.61 レンズ補正フィルターの使用例

「レンズ補正」フィルターの使用例

元画像

「レンズ補正」フィルターの使用例

レンズ補正適用後


レンズ補正... 
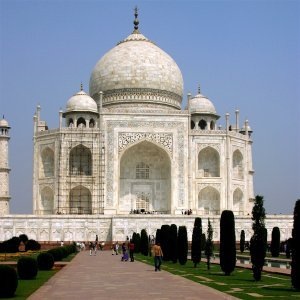
フィルターはカメラレンズのガラスがもとで写真画像に発生する典型的な歪みを補正でき、 さらには模擬再現もできます。

5.5.2. フィルターの呼び出し方

This filter is found in the image window menu under FiltersDistortsLens Distortion….

5.5.3. オプション

図17.62 レンズ補正のオプション

「レンズ補正」のオプション

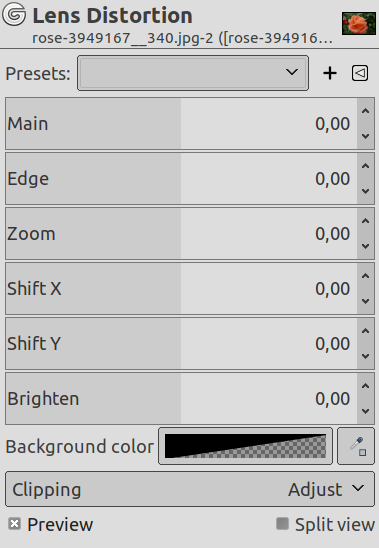
いずれのスライダーも -100.0 から 100.0 までの値をとります。

Presets, Input Type, Clipping, Blending Options, Preview, Split view
[注記] 注記

These options are described in 「Common Features」.

中央部

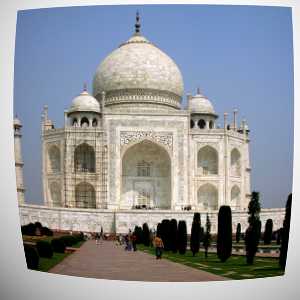
球面補正値の導入量を指定します。 正の値は画像を凸面状に、 負の値は凹面状にします。 全体として前者は画像を球面の外側から、 後者は内側から貼り付けたような効果があります。

図17.63 中央部オプションの用例

中央部オプションの用例

-100.0

中央部オプションの用例

0.0

中央部オプションの用例

+100.0


周辺部

画像の縁に球面補正を追加導入する量を設定します。

図17.64 周辺部オプションの用例 (中央部は 50.0 に設定)

周辺部オプションの用例 (中央部は 50.0 に設定)

-60.0

周辺部オプションの用例 (中央部は 50.0 に設定)

0.0

周辺部オプションの用例 (中央部は 50.0 に設定)

+60.0


拡大

仮説上のレンズによる画像の引き伸ばしや縮尺の量を設定します。

図17.65 拡大オプションの用例

拡大オプションの用例

-100.0

拡大オプションの用例

0.0

拡大オプションの用例

+100.0


Shift X, Shift Y

これらのオプションは各レンズの中心線が揃っていない場合に起こる画像のずれを表します。

上記オプションと同様、 このオプションが目に見える効果を表すためには、 中央部 および 周辺部 の設定値が 0 以外でなくてはなりません。

図17.66 Example result of Shift X option (Main set to 70.0)

Example result of Shift X option (Main set to 70.0)

-100.0

Example result of Shift X option (Main set to 70.0)

0.0

Example result of Shift X option (Main set to 70.0)

+100.0


明るさ

ビネット風ぼかしの効果の量を設定します。 レンズの曲率により光の吸収が変わるせいで明るさが増したり減ったりする現象です。

このオプションが目に見える効果を表すためには、 中央部 および 周辺部 の設定値が 0 以外でなくてはなりません。

図17.67 Example result of the Brighten option (Main set to 75.0)

Example result of the Brighten option (Main set to 75.0)

-25.0

Example result of the Brighten option (Main set to 75.0)

0.0

Example result of the Brighten option (Main set to 75.0)

+25.0


Background color

The part of the active layer outside the lens will have the background color selected here.

You can select the color:

  • Click on the color button to open the color selector dialog.

  • Click on the eye-drop button on the right to pick a color from the image.