| 3.3. MyPaint Brushes Dialog | ||
|---|---|---|

|
3. Image-content Related Dialogs |  |
| 3.3. MyPaint Brushes Dialog | ||
|---|---|---|
|
|
3. Image-content Related Dialogs | |
The ”MyPaint Brushes” dialog is used to select a MyPaint brush, for use with painting tools: see the MyPaint Brush tool section for more information on MyPaint brushes and how they are used in GIMP. The dialog also gives you access to several functions for manipulating brushes. You can select a brush by clicking on it in the list: it will then be shown in the Tool Options area of the Toolbox when the MyPaint Brush is the active tool.
The ”MyPaint Brushes” dialog is a dockable dialog. See the section Dialogs and Docking for help on manipulating it.
You can access it:
From an image menu: → → .
From the Tab menu in any dockable dialog by clicking on
 and selecting
→ .
and selecting
→ .
From the Tool Options dialog for any of the paint tools, by clicking on the MyPaint Brush icon button, you get a popup with similar functionality that permits you to quickly choose a brush from the list; if you click on the button present on the right bottom of the popup, you open the real MyPaint brush dialog.
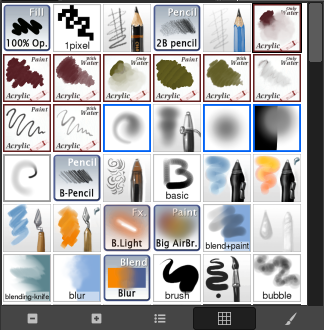
The simplified ”Brushes” dialog
This window has five buttons, clearly explained by help pop-ups:
Smaller previews
Larger previews
View as list
View as Grid
Open the MyPaint brush selection dialog
Note that, depending on your Preferences, a brush selected with the popup may only apply to the currently active tool, not to other paint tools. See the Tool Option Preferences section for more information.
In the Tab menu, you can choose between and . In Grid mode, the brush shapes are laid out in a rectangular array, making it easy to see many at once and find the one you are looking for. In List mode, the shapes are lined up in a list, with the names beside them.
In the Tab menu, the option Preview Size allows you to adapt the size of brush previews to your liking.
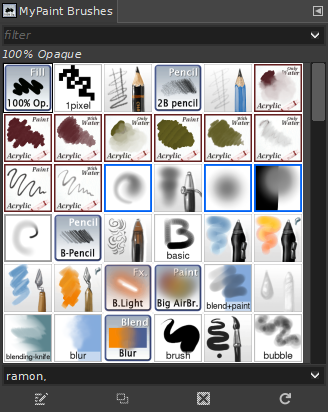
At the top of the dialog appears a filter box where you can filter the MyPaint brushes shown based on their tags; and the name of the currently selected brush.
In the center a grid view of all available brushes is shown, with the currently selected one outlined. Below the grid is a box that shows the tags assigned to the currently selected brush.
For the most part, the dialog works the same way in List mode as in Grid mode, with the following exception: the name of the current brush isn't shown at the top.
When you click on a brush preview, it becomes the current brush and it gets selected in the MyPaint Brush Tool Options. You can also click on buttons at the bottom of the dialog to perform various actions.
You can use tags to reorganize the MyPaint brushes display. See Kohta 3.7, ”Tagging”.
At the bottom of the dialog you find the following buttons:
This is currently always disabled since GIMP does not support editing MyPaint brushes. This is also the reason why there is no create new brush button.
This button is also always disabled.
This option is always disabled as far as I have seen.
If you add brushes to your personal
MyPaint brushes
folder or any other folder in your MyPaint brushes search path,
this button causes the list to be reloaded, so that the new
entries will be available in the dialog.
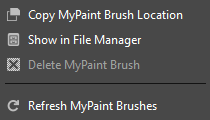
Some of functions performed by these buttons can also be accessed from the dialog pop-up menu, activated by right-clicking anywhere in the brush grid/list, or by choosing the top item, , from the dialog Tab menu.
Right clicking on a brush preview opens a context menu. Most of the commands of this submenu are described with the Buttons, except for the following.