| 8.55. Umbral | ||
|---|---|---|

|
8. El menú “Colores” |  |
| 8.55. Umbral | ||
|---|---|---|
|
|
8. El menú “Colores” | |
The Threshold filter transforms the current layer or the selection into a black and white image, where white pixels represent the pixels of the image where the value for the chosen Channel is in the threshold range, and black pixels represent pixels with a value outside the threshold range.
Se puede usar para realzar una imagen blanca y negra (por ejemplo, un texto escaneado) o para crear máscaras de selección.
![[Nota]](images/note.png)
|
Nota |
|---|---|
|
As this filter creates a black and white image, the anti-aliasing of the original image disappears. If this poses a problem, use the Levels tool instead. |
There are different possibilities to activate this:
You can access it from the image menu through → ,
or by clicking the
 icon in the Toolbox if Threshold has been enabled as a tool (which is
disabled by default). For this,
please refer to Sección 1.13, “Caja de herramientas”.
icon in the Toolbox if Threshold has been enabled as a tool (which is
disabled by default). For this,
please refer to Sección 1.13, “Caja de herramientas”.
“Presets” are a common feature for several Colors commands. You can find its description in Sección 8.1.1, “Características comunes de los colores”.
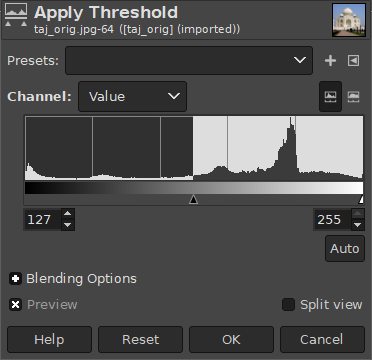
This allows you to select which channel(s) will be used to apply the Threshold. The default is Value, which will use all color channels, but you can also choose to use a single channel: Red, Green, Blue and Alpha (only available when the layer has an alpha channel), Luminance, or RGB.
These two buttons to the right of the Channel selection let you choose the type of histogram shown.
The Threshold tool provides a visual graph, a histogram, of the intensity value of the active layer or selection. You can set the threshold range either using the minimum and maximum input boxes, or by clicking and dragging on the graph. It allows you to select a part of the image with some intensity from a background with another intensity. Pixels inside the range are white, and the others are black. Adjust the range to get the selection you want in white on black background. The button can be used to automatically adjust the threshold.
These are common features described in Sección 8.1.1, “Características comunes de los colores”.
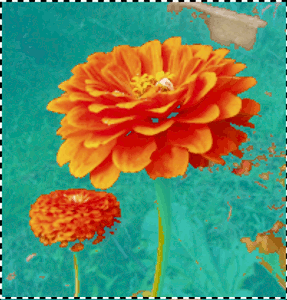
That's not always the case, but an element you want to extract from an image can stand out well against the background. In this case, you can use the Threshold tool to select this element as a whole. Grokking the GIMP described a method based on a channel mask, but now, using the Quick mask is easier.
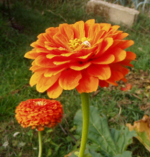
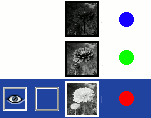
First start decomposing your image into its RGB and HSV components by using the Decompose filter. A new grayscale image is created and the components are displayed as layers in the Layer dialog. These layers come with a thumbnail but it is too small for an easy study. You can, of course, increase the size of this preview with the dialog menu (the small triangular button), but playing with the “eyes” is more simple to display the wanted layer in the decompose image. Select the layer that isolates the element the best.
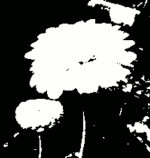
Active la herramienta umbral de la imagen descompuesta. Moviendo el cursor negro, ajuste el umbral para aislar mejor el elemento a extraer. No será perfecto: se realzará el resultado con la máscara de selección que se está creando.
![[Aviso]](images/warning.png)
|
Aviso |
|---|---|
|
Asegúrese de seleccionar la capa correcta antes de activar la herramienta umbral: cuando se abra, no podrá cambiar a otra capa. |
Figura 16.253. La capa seleccionada después de ajustar el umbral
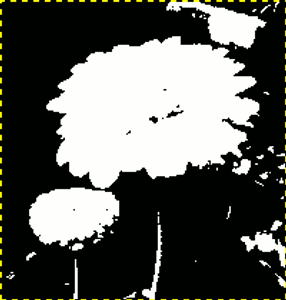
Se obtiene el mejor contorno para la flor. Hay muchos objetos rojos que se deben quitar.
Asegúrese de que la imagen mostrada de la capa seleccionada es la activa y cópiela en el portapapeles con Ctrl+C.
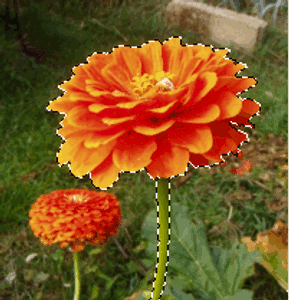
Ahora, active la imagen original. Pulse sobre el botón , en la esquina izquierda inferior de la ventana de la imagen: la imagen se cubre con una máscara translúcida roja (predeterminada). Este color rojo no le va bien a nuestra imagen con mucho rojo: vaya al diálogo de canales, active el canal de la “Máscara rápida” y cambie el color con . Vuelva a la imagen original. Pulse Ctrl+V para pegar la capa copiada previamente.
Voilà. Su máscara de selección está lista: puede mejorar la selección de la manera habitual. Cuando la selección esté lista, desactive la máscara rápida, pulsando otra vez su botón: verá el desfile de hormigas alrededor de la selección.
Se ha usado la ampliación para trabajar a un nivel de píxel, el lazo para quitar grandes áreas, el lápiz (para obtener límites duros), pintura negra para quitar áreas seleccionadas y blanca para añadir áreas seleccionadas, especialmente para el tallo.