| 5.3. Hue-Saturation | ||
|---|---|---|
 |
5. Color Tools |  |
| 5.3. Hue-Saturation | ||
|---|---|---|
| |
5. Color Tools | |
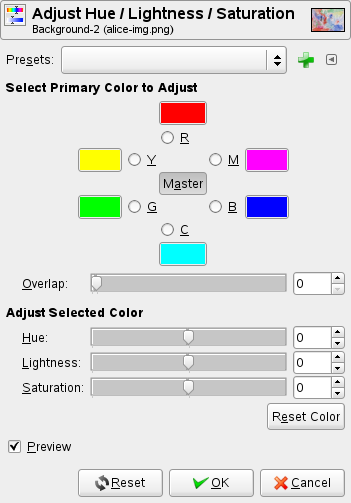
The Hue-Saturation tool is used to adjust hue, saturation and lightness levels on a range of color weights for the selected area or active layer.
You can get to the Hue-Saturation tool in two ways :
In the the image-menu through: → → , or →
By clicking the tool icon:
 in Toolbox, provided that you have installed color tools in Toolbox.
For this, go to
Tools Dialog.
in Toolbox, provided that you have installed color tools in Toolbox.
For this, go to
Tools Dialog.
You can save the color settings of your image by clicking the
button

The
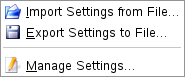
![]() button opens a menu:
button opens a menu:
which lets you Import Settings from File or Export Settings to File, and gives you access to the Manage Save Settings dialog:
You can choose, between six, the three primary colors (Red, Green and Blue) and the three complementary colors (Cyan, Magenta and Yellow), the color to be modified. They are arranged according to the color circle. When hue increases, hue goes counter-clockwise. When it decreases, it goes clockwise. If you click on the Master button, all colors will be concerned with changes. GIMP standard is to set Red as 0. Note that this colors refer to color ranges and not to color channels.
Hue changes are shown in color swatches and the result is visible in the image if the “Preview” option is enabled.
This slider lets you set how much color ranges will overlap. This effect is very subtle and works on very next colors only:
Figure 13.133. Example for the “Overlap” option
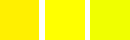
Original image. From the left to the right: a reddish yellow (255;240;0); a pure yellow (255;255;0); a greenish yellow (240;255;0).
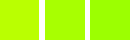
Overlap = 0. Hue = 15. Colors become (186;255;1), (168;255;1), (156;255;1).
Overlap = 100. Hue = 15. Colors become (192;255;1), (168;255;1), (162;255;1). Because of overlap, greenish is less green and reddish is less red.
Hue: The slider and the input box allow you to select a hue in the color circle (-180, 180).
Lightness: The slider and the input box allow you to select a value (luminosity): -100, 100.
![[Note]](images/note.png)
|
Note |
|---|---|
|
Lightness changes here concern a color range, while they concern a color tone with Curves and Levels tools, which work on color channels. If you change the Yellow lightness with Hue-Saturation, all yellow pixels will be changed, while only dark, bright or medium pixels luminosity will be changed with Curves or Levels tools. |
Saturation: The slider and the input box allow you to select a saturation: -100, 100.
The Initialize Color button deletes changes to hue, lightness and saturation of the selected color.
The Preview button makes all changes dynamically so that they can be viewed straight away.